I posted this picture a while ago and several people asked about the cutting frame. So this is about how to build one of your own.
First, though, some tips on what it is actually for and how to use it.
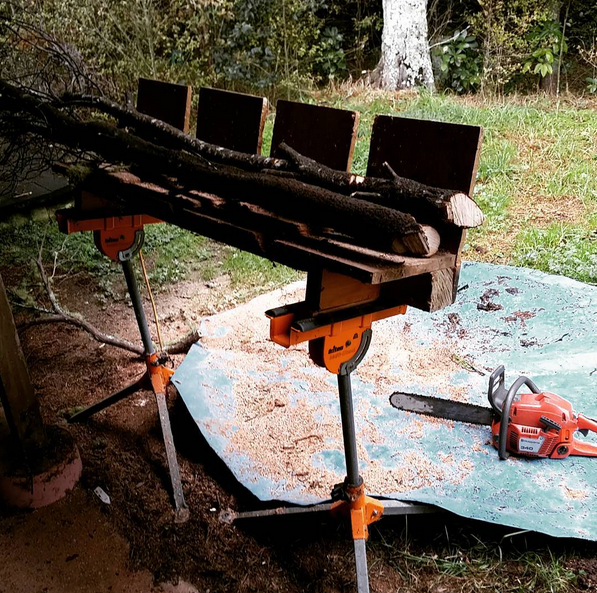
It is for cutting firewood to even lengths so that it stacks better and also so that it fits into a wood burner. Take logs that are more-or-less trimmed of sticking out bits and lay them with the thickest ends all at one end. That is the nearest end to the camera in the photo. They don’t have to be meticulously trimmed, just enough to lay fairly flat. Don’t worry about the length yet either.
You can’t see it in the photo but at the far end there is a bungee cord that loops over the logs holding them into place. I often don’t use it, but if they are an awkward shape or very bushy the bungee is really useful..
One the logs are in place trim the excess length off the far end. Do make sure you do this first. The temptation is to make that first cut of the logs on the thick end but they’ll start moving around as their weight redistributes. So cut them to overall length first. Actually if you aren’t using the bungee you can often slide the cut off lengths over the ones already lying on the frame. If you do that then you still have to length-trim those lengths too.
The rest is obvious. Just use the guides to cut to length, take the resulting lengths off and stack.
Repeat.
Now how to build it. I should say that the original came out of a magazine (NZ Consumer) a few years back. I’ve modified the design a lot from that and I can’t find theirs now anyway so I’m okay to describe this.
The legs are a pair of Triton MSA200s I have various other uses for. If you can’t get those and need to substitute make sure the top can sit at an angle. You want the frame deck to slope a bit backwards, and you want legs that will clamp onto it. I originally built this with wooden legs but they did not last. Maybe you can make better ones.
The overall length of the deck is 1400mm, so I needed a 1400x300x25 board for the deck. I used solid wood for that, and I used the same for the four uprights at the back, but I’ve since replaced those uprights with 25mm plywood which performs better. Those are each 290×400. Underneath the deck is a 100×100 post that everything else is screwed onto. Do screw it rather than nail it. Nails will work loose on something like this.

This shows the underside of the frame, which should give you enough idea how to put it together. The near side is the deck and you can see I have cut holes in it over the years. The board on the front (bottom in the picture) helps hold the deck together. This also shows the bungee cord, much of the time it dangles from a staple in the post.

This is a close up of one end to show how that works. There are two pieces of wood supporting the deck and under each of them is the extra bit that the Triton legs can clamp onto. You’ll notice there are holes bored in the latter. These have no significance. I built it mostly out of scrap, and those bits of scrap had holes…